Showing posts with label Sponging. Show all posts

Sunday, 25 September 2016

Crazy Crafters Blog Hop with guest stamper Paula Dobson


Welcome to the Crazy Crafters Blog Hop with our 
Special Guest stamper Paula Dobson

This month we are excited to CASE (Copy And Selectively Edit) any project that has been created by Paula.
We hope you find great inspiration from the projects.

You may just be starting the blog hop here at my blog Angela Lorenz or may have come from the person previous to me.

Be sure to click on the person listed under me further down the page to continue your journey on this blog hop.

We are thrilled that Paula said yes to playing along with the Crazy Crafters this month.

This is Paula's creation I have cased :) 


On my card I have gone with our Aussie Summer theme using the Lovely As A Tree stamp set and sentiment is from the Sheltering Tree set


Thank you for taking the time to pop by to check out my card, and be sure to check out all the ladies creations in the hop and show then some blog love by leaving a comment.


Thanks for taking the time to visit my blog


Product List

Thursday, 9 June 2016

Fairy Celebration

Can't believe I am back in the craft room again! 
I have been so busy with Tafe updating my certificates for the salon it feels like forever since I crafted. This morning I had to have a play with the Fairy Celebration stamp set. I love anything with fairies and butterflies so this set was on the top of my wish list.


First I stamped both fairy images onto a piece of copy paper and cut out to use as a mask. Then I coloured the background on a piece of Whisper White using the SU sponges in So Saffron for the sky and Old Olive for the ground.
Remove mask an stamp your images and then coloured with Stampin Write Markers. I love how this turned out and hope you do also.


Thanks for visiting my blog


Product List

Sunday, 13 March 2016

Timeless Textures

Today's card I have used Timeless Textures combined with a Mosaic stamp I made from the rubber that surrounds the stamps we buy. I have been keeping the extra rubber and thought I would use it someday for something.


I like the grunge look of cards and wanted to try my hand at it.
First I stamped around the edges on a piece of Whisper White with one of the edge stamps in Soft Suede. Then stamped 3 of the dotted line images in Tip Top Taupe randomly. Randomly stamp 3 of the Flourishes in Basic Black Archival Ink. To finish off before adding the Mosaic randomly stamp the dots all over page in Early Espresso stamping off as you go to get the lighter colours.  
Once happy with the effect you want, arrange little cut up bits of rubber onto a acrylic block to look like picture below. You need to make sure the gaps between each piece of rubber aren't too big as the "grout" lines will be much too wide.
Mine is permanently stuck on this acrylic block now and is large enough to cover a card front.


Once arranged you can now ink up using versamark. Stamp directly over entire image you have created then heat emboss in clear embossing powder.

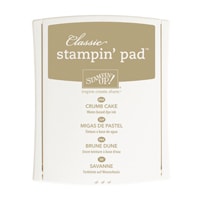
When cooled you now get a sponge and "fill" the grout lines using Crumb Cake Ink. Then with a clean cloth wipe over the project to remove excess ink from the embossing. Sponge all edges in Early Espresso.

Sentiment is from Sky Is The Limit stamp set

I hope you like this card and if you have any questions please leave a comment or you can contact me by email.

Thanks for visiting my blog


Product List